PREFER A FREE QUOTE FOR MEASURE & INSTALL?
Please read through guides provided before proceeding with your installation.
Tools - you will need:
Cordless Drill
3 mm Drill Bit
5/32 Drill Bit
Phillips Screwdriver
Hacksaw
Pop Rivet Gun
Step 1. Sliding the non-active door
When you install a sliding door it is important to align top rollers to the top track first. Then lift the bottom rollers up on to the bottom track. Slide back and forth to make sure that you have rollers correctly on the track; do this with both doors.
Place the non-active door on the inside track and using bottom rollers only, adjust to line up the back of the door with the receiving interlock on the fixed glass panel. If there is no receiving interlock adjust to line up the back of the door with the glass side of the fixed glass panel. Ensure the door is perfectly square and parallel.
 1.1
1.1Step 2. Sliding the active door
Place the active door onto the outside track and using bottom rollers only and adjust to line up parallel with the closing channel.
Step 3. Interlocks
If no receiving interlock is present on the fixed glass panel then install before proceeding. Install the frame interlock to the back of the non-active door using 5 x 5/32 rivets. Roll the door back and forth to make sure that frame interlock is connecting with fixed glass panel receiving interlock cleanly.
 1.5
1.51.6 Step 4. Installing the Lock
Bring the active door to the closed position in the receiving channel and mark the required location of where the striker receiver will be installed. Using a 3 mm drill bit drill in the centre of the two elongated holes and attach the striker receiver with the screws provided. Close the door and adjust as necessary.
Step 5
Place the active door in the locked position. Place the non-active door in the closed position with the frame interlock connecting with the receiving interlock on the fixed glass panel. This should now align the internal non-active door frame with the back of the active door frame; they should line up one behind the other.
Step 6
Make a vertical mark on the non-active door frame both top and bottom to indicate the back of the active door where the frame interlock will be installed. Slide back the non-active door and install the receiving interlock to the face of the non-active door where marks are indicated.
Step 7
Return the doors to closed position and install the frame interlock to the back of the active door. Open the active door, it should connect with the non-active door and push both doors into the fully open position. Now slide the active door into the closed position which should effectively interlock with the non-active door pulling both doors into the closed position. All doors should interlock with the active door locking into the closing channel and the non-active door locking into the fixed glass panel.
Step 8
Once the locking mechanism is functioning correctly go inside and adjust the top rollers to take any up-and-down movement out of the doors. Slide doors to the fully open position and then into the closed position several times to ensure proper function.
 Stacker Animation
 1.1
1.1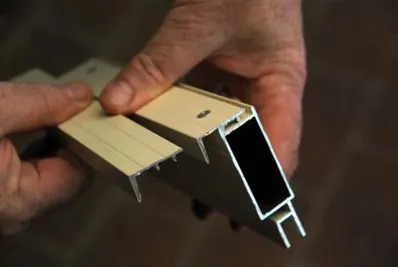 1.5
1.5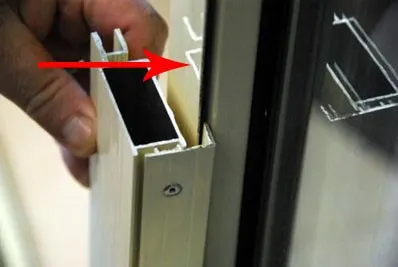 1.6
1.6 Stacker Animation